For my next tutorial I was looking for something fun, inexpensive, and kinda kitschy...
So I went over to my friend, Brooke's, new place (soooo much closer to me!) and her roommate (who has also become a good friend of mine) was putting these really neat buttons on the HUGE mirror they have over the fire place in their living room.. well I thought...What a super cute idea!! But of course, buttons are always so expensive and hers were all vintage-y looking and pretty so I just assumed they were going to be an arm and a leg... but I asked her where she got them anyway and she said Michaels, and that they weren't that expensive... ummm...I almost had a stroke...
So of COURSE I go to Michaels and sure enough..in the sewing section on the bottom shelf are these bags of buttons:
 | ||||||
| In case you can't read it, it says "Vintage Buttons" and then gives a full explanation of where the buttons come from! |
So I take my lovely buttons home, very pleased with my purchase and I take a final look at my full length mirror in my room.... stickers all around it...looking pretty high-school-ish....
And since we don't need to see my room, just the mirror, here it is on the floor.. see all the stickers?
Yeah...some of those are the plastic-y ones which are a BREEZE to get off....the others, as you might be able to see, are the more paper-y ones, which are a pain in the you-know-what to get off...
Before I go any further...here is what you will need for this project...
SO...I sat there in frustration trying to peel off these paper stickers and pretty much getting no where (if you've ever done this, you know what I'm talking about, the sticky part of the sticker just stays there and you curse to yourself repeatedly and wonder why on gods green earth you thought it was a good idea in the first place to put the stickers on this mirror)....alright...I needed a plan...I decided that a soggy sticker was easier to get off than a dry one, so I would use my AMAZING 409 (seriously, best cleaning product ever) to soggy up the stickers and presto they would come off....well...all that did was get my hands wet, sticky, and 409-y....ok...new plan....
I thought and thought of a way to scrape off the nasty sticker-y goop... AHA!! A razor blade!!! Just the other day I bought a variety pack of razor blades for my x-acto knife because I couldn't find a pack of just the regular replacements...which included the circled blade below..
Now, when I bought this variety pack, I thought Who would use THAT blade for anything?!?!
Oh my, how naive of me...
It worked PERFECTLY, I didn't even have any residue left over!!! So I got all of the stickers off and squeaky-cleaned it!
Ready to go!
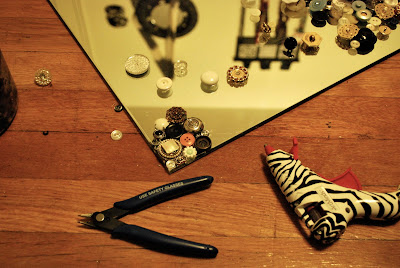
Oh! I forgot! You're also going to need some kind of wire snipers or something like these to cut off the back of most of the buttons since you want them to lie flat on your mirror.
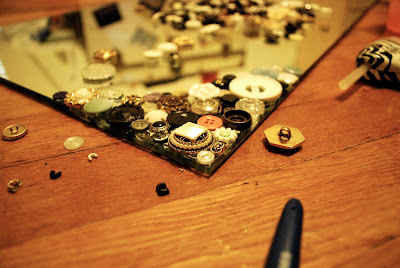
So I heated up my lovely new zebra striped hot glue gun and started going to town. Make sure if you decide to do this project and want the buttons to all fit together snugly that you lay out your buttons at least a few at a time before you glue them down.
And keep going until you get an area covered that you like.
Now the other side.
Alright, Time to do the bottom, make sure everything is reasonably proportionate (but you want it to be a little off-kilter...)
Here's the finished product!!!
What do you think!?! A complete mirror makeover for only $9.20!!!
You could also do picture frames, cork boards, whatever you want like this! I think they would all be extremely cute!!
I hope you enjoyed this and happy buttoning!!!
loves


